
After thee house has been staked out, the next step is the placement of the under slab plumbing. The proper placement of drain lines is important due to the the inability to make changers at a later date.
The proper placement of the under slab plumbing starts with an accurate Plumbing Diagram. The Diagram consists of the exact location of the drain line and their termination points. An accurate Plumbing Diagram assists the installer in two ways. First, the installation of the drain lines can be expedited, and secondly, it reduces waste in the materials
The generation of the Plumbing Diagram needs to occur as a three (3) step process.
Step1: First, calculate the elevation of the final Top-of-Slab. Working from that elevation, and calculating the longest run of pipe, the flow of the drain line at the house envelope can be determined. Utilize ¼”/foot slope on all drain lines. The end of the ¼”/foot slope should terminate where the drain line will exit the house envelop.
Step 2: Location of plumbing fixtures and sanitary piping should be documented. The decision of what piping materials to utilize should occur. Continue to reference elevations at each fixture so as to maintain the proper flow.
Step 3: Hot and cold water lines should be located on the diagram. Whereas the sanitary drain lines need to be dimensionally located, the location of under slab supply lines have more flexibility.
Installation
With the fixture locations identified, and the depth and slope of the lines noted, the pipe can start to be installed. The installation should follow the following four (4) step process.
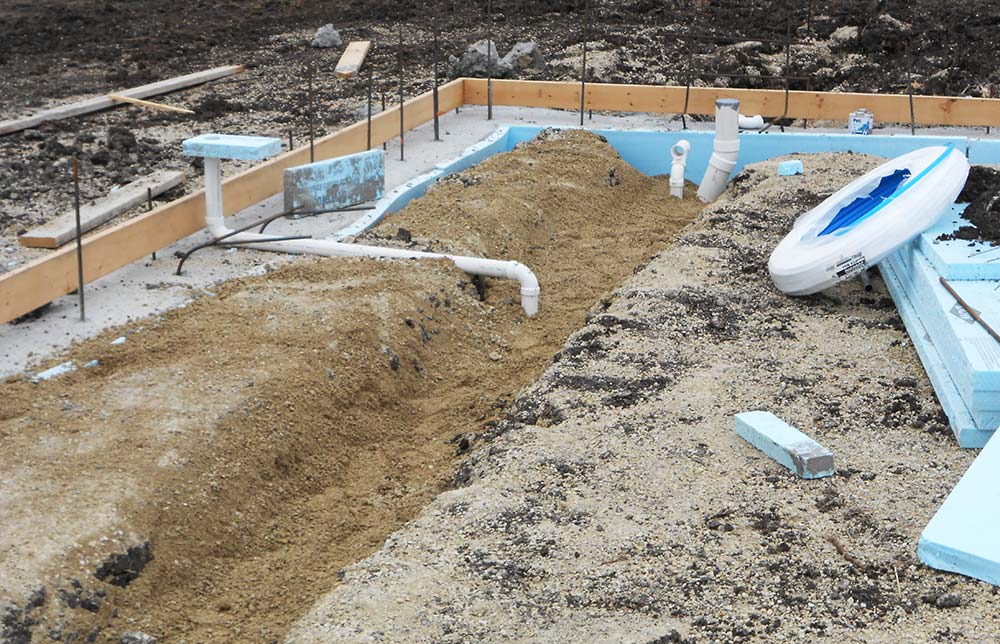
Step 1: Clear the site of all debris and materials. With the pad, composed of stone screening in place, the contractor provides trenches where the drain lines are to be located. Lay the material in the trench to verify all materials have been provided. If needed, make adjustments in the field and reflect the changes on the diagram.
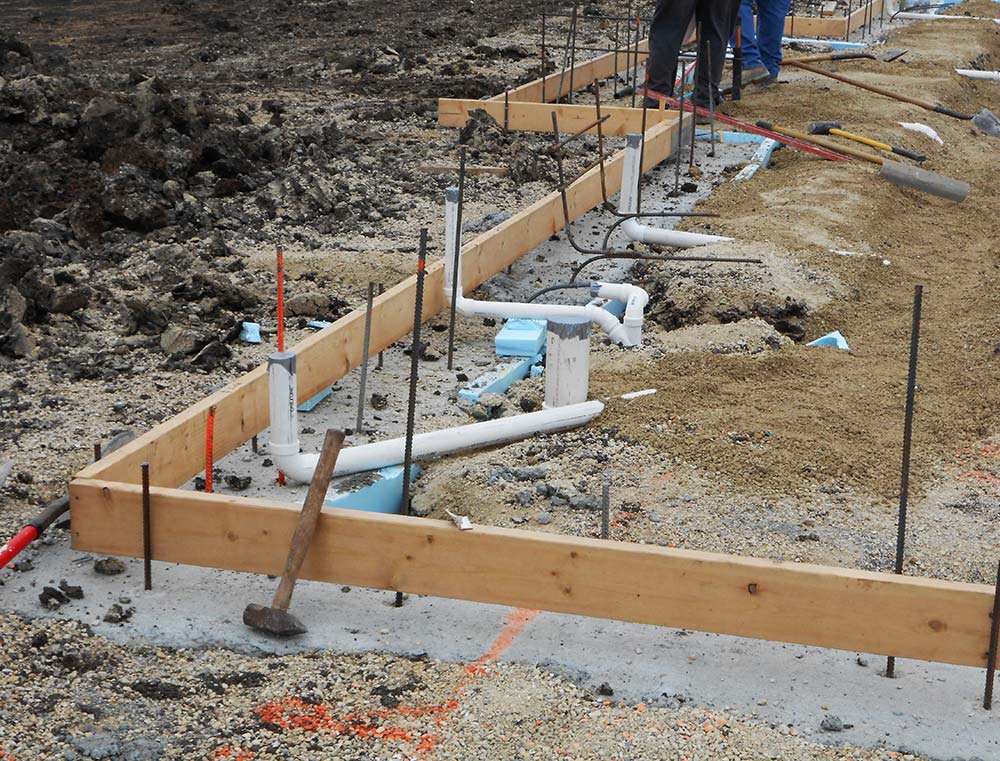
Step 2: Place the pipe sleeve at the proper elevation at the Grade Beam. The sleeve should extend 24” from the exterior grade beam on each side. Secure the sleeve with a gravel base and wire ties.
Step 3: Lay a four (4) inch gravel base for the sanitary pipes to lay on. Provide extra gravel for any field adjustments.
Step 4: Lay the pipe from the point of entry into the house, working back towards the fixtures. The largest pipe is the 4” sanitary line. Because of its bulkiness and weight, it is easier to install it first. Stub up approximately 12” AFF and cap the pipe. Use color paint to identify drains and supply.
Step 5: Pour the grade beams first making sure that the sleeve is held tight. Adjust the sleeve immediately should any deviations occur.
Step 6: Pour the slab-on-grade. A final verification of all drain and supply is critical. Hand work concrete around drain and supply lines so as to not all discrepancies to occur.
Materials
The preferred material for all sanitary drain lines is PVC pipe. PVC is flexible, lighter and easily connected with each other by using glue and clamps.
For water lines, both hot and cold supply, PEX piping is preferred. The advantages of the PEX over copper are as follows:
- Cost: PEX is less expensive. Typically, for a 100 foot of ½” PEX the cost is $25.00. In contrast, the same length and size of copper will cost approximately $150.00.
- Installation: PEX is much easier to install than copper piping. In addition, the time frame for the installation of PEX is substantially lower than copper by about 50%.
- Quantity of Fittings: Because of its flexibility, PEX can bend thus reducing the number of fittings by approximately 40%.
- Resistance to Freezing: Due to its flexibility, PEX is much more resistant to freezing than copper.